Friday, August 6, 2010

What do you do with okra from the CSA?

First of all, the CSA (community supported agriculture) is a magical thing. Each week, two friends and I pitch in $5 each and we come home with a grocery bag full of yummy local produce. My favorite so far has been the garlic.

Where, you ask, are the photos? In my imagination. Each week, as I've roasted vegetables (lots of potatoes, carrots, garlic, and shallots), I've had that niggling feeling of "I should bring out the camera." I don't like shoulds. The petulant five year old in me thought, "Nah. Don't wanna."

So, no pictures.

But that was before the okra.

When the CSA gives you those delectable little bits of star shaped yumminess, they practically beg to be photographed. Sadly, when I take photos, they often look just delightful on the teeny little screen on my camera. Not so in the harsh light of full-sized glory. Instead, they often look like this:


Cute, right? If okra slices had cheeks, I would definitely be pinching them. But blurry. Cursed shaky hands. It's hereditary. I should use a tripod, I know, but haven't we already discussed this? I don't like shoulds. So, I'm posting a blurry picture, challenging another thing I don't like. My tendencies toward perfectionism.

But enough about me.

Let's get back to that original question. What do you do with okra from the CSA? You fry it up like any right-minded southern woman would, of course!

I usually try to eat healthy, but there's no "light" version of this stuff. You slice it, dredge it in egg and seasoned (salt and pepper) cornmeal, and fry it up. In vegetable shortening. That's right, I said it. Vegetable shortening. I'm not going to lie. This is a food substance that usually gives me the artery clogging heebie jeebies, but I put that prejudice aside when it comes to two things. Okra and bourbon balls. (I have pictures of those from Derby Day and I should have posted them by now, surely, but, well...you get the point.)

What comes out of that sinful hot liquid is this:


They were less blurry in real life and much, much tastier. I'm drooling right now just looking at this photo.

And of course, if you want a true southern supper (which I never call supper, but when eating fried okra, do as the fried okra eaters do...or something), you just add some corn on the cob and sliced tomato. With salt of course. On the tomato. The corn doesn't need it.


Look at that tomato. Gorgeous. I didn't even change the color saturation on this photo. That thing was THAT RED in real life! Swoon.

I have a confession to make. I had never made corn on the cob myself before and I have to admit, it made me feel like I'd passed some threshold of grownupness.

Sunday, May 9, 2010

Asparagus!!!!

Spring is here...and that means asparagus is, too. I like to pick my own asparagus. If you haven't done this, you must. Asparagus is a perennial, so it just keeps returning and growing in a random fashion. You just find mature stalks and snap them right there...and you can eat asparagus raw right out of the ground. It's so tender and sweet!

I made a fritatta out of some of my asparagus. There are no pictures, but it was yummy...mushrooms, asparagus, and eggs. What's not to love?

Anyway, here's what the asparagus looked like in its natural habitat.


And here's what it looked like when I was finished with it.


You might notice that the sesame seeds are missing. That's because I toasted them separately (not with the tofu, as directed). I added them at the end, after I took this photo. I did take photos, but I didn't like any of them, so you don't get to see them.


Sesame Tofu Stir-Fry over Rice - from Cooking Light

1 tablespoon sesame seeds
1 tablespoon black sesame seeds
1/2 teaspoon salt, divided
1 (1-pound) package firm or extrafirm tofu, drained and cut into 1-inch cubes
2 teaspoons peanut oil
2 teaspoons dark sesame oil
Cooking spray
4 cups thinly sliced shiitake mushroom caps (about 3/4 pound)
3 cups (2-inch) slices asparagus (about 1 pound)
1/4 cup thinly sliced green onions
1/2 cup fat-free, less-sodium chicken broth
2 tablespoons hoisin sauce
1 1/2 tablespoons low-sodium soy sauce
1 teaspoon cornstarch
1 teaspoon chili garlic sauce (such as Lee Kum Kee)
2 cups cooked long-grain brown rice

Combine sesame seeds and 1/4 teaspoon salt in a large bowl. Add the tofu cubes; toss gently to coat. Combine oils in a large nonstick skillet over medium-high heat. Add tofu; stir-fry 5 minutes or until tofu is golden. Remove tofu from pan; keep warm.

Return pan to heat; coat with cooking spray. Add mushrooms; stir-fry 3 minutes or until mushrooms begin to brown. Add asparagus; stir-fry 4 minutes or until asparagus is crisp-tender. Reduce heat to medium; stir in green onions.

Combine broth and next 4 ingredients (broth through garlic sauce). Add broth mixture to pan; remove from heat (sauce will thicken). Add tofu and remaining 1/4 teaspoon salt; toss gently to combine. Serve over rice.

A Non-Easter Bread Pudding

So, what's a girl who doesn't celebrate Easter to do on Easter Sunday?

I don't know. But why not make a bread pudding and feed it to your Episcopalian friend who is celebrating the fact that she can drink alcoholic beverages again, now that those 40 days are over? That's what I did.

I know what you're thinking. Easter was a long time ago. It's true. What can I say? I'm working on a doctorate, so sometimes other things slide a bit. Especially when those other things are my "Hey, no pressure!" projects.

Back to the bread pudding.

First I jaunted over to my neighborhood bakery and got some of that yummy, crusty, European style bread. I cut it up into cubes and put in in a dish suitable for baking.


Then, I measured out some goat cheese.


You know a dish is going to be good when it calls for gobs of goat cheese.

Next? Add some milk. Mine got a fleck of bread crust in it, so if you want to follow in my footsteps, make sure yours does, too. But know that the recipe doesn't call for it.


And now...more cheese! Cottage, this time.


That's not very appetizing. Throw in some pepper to cover up those unappealing lumps.


Now, add some eggs. I don't have a picture for this step. Sometimes I take photos and they look fairly splendid on my little 1.5 inch viewer and not so splendid when I can see them full size.

So, use your imagination. You know what eggs look like. Just picture them mixed into that white, pepper-flecked concoction up there.

Pour that yummy cheesiness over the bread crumbs and add some green onions. Admittedly, this was a mistake on my part. The onions were supposed to be saved for last.


Bake it, and then it gets all golden and gooey and delicious. Trust me on that last part. I am now a HUUUUUUGE fan of savory bread puddings. So easy and tasty! That said, I can almost guarantee that the glass of wine I had with it wasn't nearly as good as my friend's. Forty days will make a cheap white taste spectacular. At least, that's what I hear.


The recipe instructed me to wait 40 minutes after removing this scrumptiousness from the oven, so that it would have time to set. I am not nearly that patient. I served it immediately and bit into it as soon as I felt reassured that my tongue wouldn't suffer any injury.


Savory Bread Pudding with Goat Cheese - from Cooking Light

1 (1-pound) loaf firm white bread, cut into 1-inch cubes (about 12 cups)
Cooking spray
1 cup (4 ounces) crumbled goat cheese, divided
2 cups fat-free milk
1 cup 1% low-fat cottage cheese
1/4 teaspoon freshly ground black pepper
3 large eggs
3 large egg whites
1/4 cup sliced green onions


Preheat oven to 350°.

Arrange bread in a 13 x 9-inch baking dish coated with cooking spray.

Combine 1/2 cup goat cheese and next 5 ingredients (through egg whites) in a medium bowl, stirring well with a whisk. Pour milk mixture over bread; top with remaining 1/2 cup goat cheese. Cover with foil coated with cooking spray. Refrigerate for 8 hours or overnight.

Remove bread pudding from refrigerator; let stand at room temperature 30 minutes. Uncover and bake at 350° for 40 minutes or until set and golden brown. Sprinkle with onions.

Sunday, April 25, 2010

Sushi. In Middle America.

So, I got sidetracked there for a while.

That's what happens when a laptop fries not one, but two motherboards. And an LCD screen. And then, an unknown virus and its fever struck (me, not the computer). And it's the end of the semester, which is crazymaking all on its own.

Needless to say, there's not been a whole lot of cooking in my kitchen these days.

However, I have some photos stored up from pre-computer death/resurrection (it was a bit after Easter, but can I still make that joke?).

Sushi. It's just as much fun to make as it is to eat and it's one of my favorite dinner party activities.

First, you make the rice. Which, I'm not ashamed to admit, has been my meal all on its own on more than one occasion. You need this stuff:


Those white powders are sugar and salt. Yes, sushi rice is addictive. No, it's not because of cocaine.

The recipe I use calls for 500 mL of rice. I don't really understand this, because my rice comes in solid, not liquid, form, but what do I know? The rice always comes out splendidly, so I don't question it.


You have to wash the rice. I'm not talking about soap scrubbing, behind the ears kind of washing here. Just a little rinse will do. And by little, I mean rinse until the water is nearly clear. This always takes longer than I think it should. And as I'm rolling the rice between my fingers, dislodging whatever that rice powder is that clouds the water, and pouring said cloudy water down the drain only to add a fresh batch, I can't help but think of how wasteful it is. You know, about those people in Africa who have to walk miles and miles to pull a bucket full of water from a well. I pause, think about how grateful I am to be fortunate enough to have what I have, and then get back to rinsing. If you're more of an environmentalist than I clearly am (or just lazy), you can skip this step. I've tried it and it seems to make little, if any difference.


After you wash the rice, put it in a pan with 600 mL water. The recipe says to let the rice drain for 30 minutes, but I am way too impatient for that. Who knows? Maybe I'm missing out on even more sushi magic by omitting that step, but I doubt it. Heat the water to boiling, cover the rice, then reduce heat to let the rice simmer for 18 minutes. Remove the pan from the heat and let the rice steam for 15 minutes. No peeking! I feel bad saying that, because it's in the instructions and just the fact that it's there makes me want to lift the lid every time I make this rice. But you know how steam works, right? It escapes when you lift the lid. Escapism is often good - like when it's in the form of cooking/photographing/blogging about cooking instead of doing something school related - but in this particular instance, escapism is bad. Steam needs to cuddle with the rice.


Apparently I didn't take a picture of the finished rice in the bowl. Oops. Don't worry, you'll get to see more of it later.

Here's the next group in the cast of characters in this Japanese food play.


If you have a discerning eye, you might notice the locale has changed. That's because, like a crafty cook, I made the rice the day before our sushi get together, which was hosted at a friend's house.

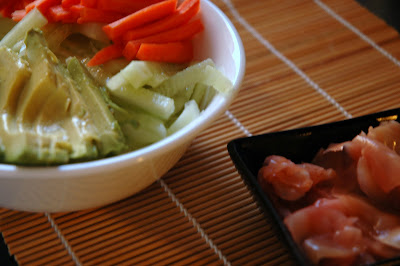
So, we chopped up some carrot, avocado, and cucumber, and got some pickled ginger ready to go.


Heeeeeere's the rice! See, I told you not to get too distraught. This rice is sticky. You will get it all over your fingers. The trick is to get it on the nori, but that can be easier said than done. Oh, and the nori? You'll want to put that on your bamboo sushi mat with the rough side up and with the short side facing you.


Once you've got all of the rice you need on the nori (not too thick, or eating will be complicated), sprinkle it with toasted sesame seeds. You can toast these yourself in a skillet over medium heat or, if you're like my friend and have recently traveled to South Korea, you'll have a jar of already toasted sesame seeds, ready to go. This option is so much easier, given the aforementioned stickiness of the rice. Usually, when I make sushi, at least half of the sesame seeds I toast get washed down the drain along with the glue, uh, sushi rice that's stuck to my fingers. Imagine it: it's just like coating your hands in paste, then trying to pick up some sesame seeds and delicately sprinkle them onto the rice. Right. But look how pretty it turns out when the seeds are in a jar!


The next step is to add some filling. Tuna and avocado are my favorite combo.


When your roll is full like you like it, roll that bad boy up. Just pick up the bamboo mat and roll it, like a sleeping bag, or a carpet. Just be sure not to roll the mat into the sushi roll.

And, voila!


And voila again!


Sushi Rice - adapted from Miyamoto

500 ml Sushi Rice
600 ml Water
60 ml Rice Vinegar
30 ml Sugar
5 ml Salt

Rinse sushi rice until water runs mostly clear. Mix rice and 600 mL water in a pot; heat water to boiling, then reduce heat, cover, and allow rice to simmer for 18 minutes. Remove pot from heat and let rice steam for 15 minutes.

While the rice is cooking, mix the vinegar, sugar and salt together in a small saucepan. Heat the mixture until the sugar dissolves, stirring frequently. Remove from heat and let your sushi vinegar cool to room temperature.

Put the hot rice into your mixing bowl and add 1/4 of the sushi vinegar solution. Mix with a folding motion so as to not smash the sushi rice. Repeat until all sushi vinegar is used.

Note: the original recipe called for wooden sushi bowls and a fan. I use plastic bowls and just let the rice cool at room temperature and this seems to work just fine.

You can fill your sushi with whatever you like; my favorites are tuna, carrots, cucumber, and avocado. I would use more raw fish, but so far I've only been able to find sushi grade tuna where I live. Cooked shrimp is also good.

Sunday, March 21, 2010

Fetafetafetafetafeta!

I think beginnings are weird. Think Bambi taking his first steps. Think two kids at a junior high dance, not sure how to start talking to each other. I think that's the metaphor I'll go with here. I feel like starting to post to this blog is a bit like being at a middle school dance. I like the music, but I probably couldn't tell you who the band is. And that boy is cute, but what do I say? And dance steps? Please.

So, welcome to (what I feel like is) my awkward beginning. This isn't a statement of self-handicapping, just one of brutal honesty. I feel like I need to acknowledge the fact that, all of a sudden, I've decided to start posting pictures of my food to the internet. Notice I didn't say "start taking pictures of my food," because I've been doing that for some time now. Anyway, it's strange, isn't it? This is me acknowledging the strangeness, because I just don't feel right about pretending like I've been doing this forever and will continue on in the same fashion.

Get ready for my first knobby-kneed steps and stiff-armed slow dance, if you will.

Anyway, it was a feta sort of day around here. Maybe it was the fact that, following an afternoon of 60 degree temperatures, the heavens opened up and dumped at least 4 inches of snow.

Gotta love the weather patterns of the midwest.

Maybe it was the snow still left on the ground. Maybe it was the fact that I had already made a batch of Smitten Kitchen's feta salsa last week and had some leftover ingredients. Whatever the magical combo of motivating factors was, I was in a feta mood. I decided to make another batch of the feta salsa and try out a recipe for feta bread from Binnur's Turkish Cookbook that I've had my eye on for a while.

Yum. I don't think you'd really have to do anything to this pile of goodness, but I did anyway.

I chopped it all up and threw it in a bowl.


With some green stuff.


And mixed it all together.


Now, on to the bread.


You know bread is going to be good when it calls for a bunch of yogurt, a bunch of cheese, a bunch of butter, and a bunch of olive oil. And there's even lots of green stuff by way of parsley, dill, and onion stirred in to make it look a little healthier. I didn't take a picture of the butter and olive oil, because, well, I just didn't think it was that pretty.


When it came out of the oven, my first thought was that it looked a bit like the landscape of an alien planet. My second thought, which quickly followed, was that I hoped all alien landscapes looked so tasty and that I couldn't wait to dig into this one. This picture of the slightly browned and crisped top really doesn't do this bread justice. It is cake-like in its moistness. And filled with feta! Did I mention the feta?


I am not going to lie. This dinner consisted of a lot of bread and a lot of cheese (all of it delicious!). With some cucumbers thrown in to make me feel a bit better rounded.


Feta Salsa (from Smitten Kitchen)

1/2 pound feta (cow’s milk)
2/3 cup sundried tomatoes in oil
1/2 cup pitted Kalamata olives
2 tablespoons fresh dill*
3 tablespoons flat-leaf parsley*
2 scallions
1/4 cup olive oil**

Crumble the feta into a bowl. Chop the tomatoes and olives, dill and parsley and thinly slice the scallions. Gently mix the ingredients together and drizzle with a few tablespoons of olive oil, or to taste.

* I cheated and used dried, 1/3 the stated amount
** I drizzled in some of the packing oil from the tomatoes


Feta Cheese Bread (From Binnur's Turkish Cookbook)

1 cup yogurt, plain
125 gr unsalted butter, melted*
125 ml (1/2 cup) extra virgin olive oil
1 1/2 cup feta cheese, crumbled
1/2 cup parsley, chopped**
1/4 cup dill, chopped**
2-3 green (spring) onion, only white parts, chopped
3 eggs, room temperature
2 3/4 cup flour
1 tsp baking powder

* I used one stick plus about 1/2 tbsp
** Again, I cheated and used dried

8x8x2 (2L) Pyrex or oven safe dish, oiled

Mix all the ingredients except flour and baking powder in a large bowl. Mix the flour and baking powder and add into the feta cheese mixture. Mix them all with the spoon. Spread the mixture into the oiled oven dish.

Preheat the oven to 375 F (180 C) and bake until the colour of the top turns golden or toothpick comes out clean. Let it cool down first. Then slice it up and serve with Turkish Tea.

[I lost track of exactly how long this took to bake, but 40 minutes is a safe estimate to start with. I think it would also be easy to make this with reduced amounts of butter and oil, but I have no idea by how much because, much as I would like to be, I'm not Alton Brown. Still, it bears experimenting with, because this is a very moist bread.]

An Inauspicious Beginning

So, what happens when two Ph.D. students/foodies discover a mutual love for food blogs?

They start one, of course.

What will follow will be our adventures in all things cooking and (hopefully) delicious. Please feel free to comment and leave us recipes to try, if you're so inclined!